Phased Array Ultrasonic Testing (PAUT)

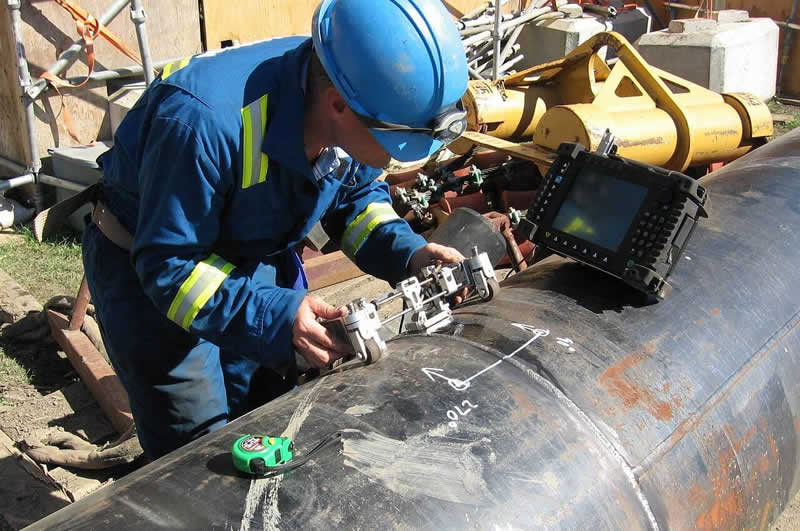
Phased Array Ultrasonic Testing (PAUT), also known as phased array UT, is an advanced non-destructive inspection technique that uses a set of ultrasonic testing (UT) probes made up of numerous small elements. Each of these is pulsed individually with computer-calculated timing to create the phased aspect of the process, while the array refers to the multiple elements that make up a PAUT system.
The beam from a phased array probe can be focused and electronically swept across an inspection piece without moving the probe itself. This differs from single element probes (also known as monolithic probes). These more conventional probes need to be physically moved or turned to cover larger areas, which is not required for PAUT.
Phased array ultrasonic testing is based on the principles of wave physics, which also have applications in areas including optics and electromagnetic antennae.
TWI
TWI has a great deal of experience in applying PAUT to a range of projects, including for fatigue cracks, wind turbine blade inspection and for testing nozzle joints.
You can find out more about our phased array ultrasonic testing capabilities here.
In addition, TWI Training offers phased array inspection courses so your staff can gain the expertise required to take advantage of this versatile advanced NDT method; find out more on the dedicated TWI Training website.
How Does Phased Array Work?
As mentioned above, phased array ultrasonic testing probes are made up of several piezoelectric crystals that transmit/receive independently at different times. An ultrasonic beam is focused using time delays, which are applied to the elements to create a constructive interference in the wavefronts. This interference allows the energy to be focused at any depth and angle in the test specimen.
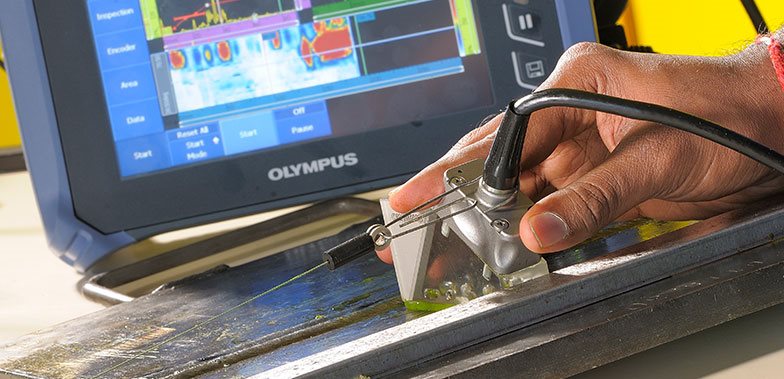
 Each element radiates a spherical wave at a specified time, creating waves that converge and diverge to create an almost planar wavefront at the specified location. Changing the progressive time delay allows the beam to be steered electronically and swept through the test material like a searchlight. When multiple beams are put together it creates a visual image that shows a slice through the test object.
There are different techniques that can be used with PAUT systems.
Total Focusing Method (TFM)
This method involves the application of the basic phased array focusing principle at a defined region of interest. The inspection region is segmented into a grid of positions, or pixels, with beamforming applied to each pixel in the grid.
Electronic Scanning
Electronic scanning reproduces the inspection performed by manually moving a standard UT probe. An ultrasonic beam is electronically translated across the entire probe, allowing for faster inspection while limiting mechanical displacement. The technique can be performed with an S or and L wave and can be combined with beam focusing and beam steering.
Sector Scanning
Sector scanning uses electronic delay laws to electronically change ultrasonic beam angles in a defined sector. This means that only one transducer is needed to inspect components under different angles and is also much faster than standard angled beam UT, displaying cross sections of the specimen in real time and allowing for easier interpretation. This technique can be combined with electronic focusing and used for L- and S-waves.
Advantages
The advantages of phased arrays over conventional ultrasonic probes include improved portability, convenience, inspection speed, and safety. A phased array is more robust and easier to use than conventional single-element probes, providing improved efficiency, capturing hundreds of signals at once, and reducing the number of false alarms. PAUT inspection strategies can be optimised to improve flaw detection when used alongside simulation, while data recording and traceability are also greatly improved.
Phased array ultrasonic testing provides a permanent record, doesn’t produce radiation and can be used for several applications. Because PAUT can detect defects at the surface and into the volume of a weld (with no dead zone), it also gives information about the lateral position of a defect (depth and height).
The main advantages of phased array ultrasonic testing include:
Simplified Inspection and Interpretation
A phased array probe can replace several conventional ultrasonic probes, making complex procedures simpler and removing the need for setting up and calibrating multiple probes. This also allows for simplified functionality, including real-time imaging.
Increased Flaw Detection
Because a probe is used to control the direction and shape of the beam, the surface can be scanned at diverse angles. This allows for increased coverage for flaw detection as well as the inspection of complex geometries. PAUT is also effective for determining material thickness, which is useful for ultrasonically determining corrosion or erosion of a test piece.
Faster Inspection Speeds
By using electronic scanning to fire successive groups of elements in an array, PAUT reduces the need for mechanical scanning and reduces inspection times. Inspection speeds are also improved compared to conventional probes as the phased arrays allow for the user to change the shape and focal point of the ultrasonic beam to optimise each inspection. This means there is no need for manual set-up and reconfiguration for each unique testing. In addition, dynamic-depth focusing allows measurements to be made at several depths in the same amount of time as it takes to complete a single depth measurement using a conventional probe. Furthermore, because digital feedback can be received instantaneously, flaw identification and weld quality assessments can be completed faster.
More Reliable Results
Reducing or eliminating mechanical scanning not only improves inspection times, but also increases the reliability of the measurements by eliminating changes in or the loss of coupling, which is a risk whenever a probe is moved. This also means that phased array probes provide test results with excellent repeatability.
Disadvantages
While PAUT delivers a number of advantages, there are a few disadvantages that need to be considered too.
These include:
Applicability
Despite the range of applications in which PAUT shines, it is not the preferred testing method for detecting surface cracks, metal fatigue or bolt hole and tubing inspections. In these instances eddy current testing is generally preferred, while PAUT is effective for corrosion detection and the inspection of composite materials and thicker welds. In addition, the angle of incidence is not always optimal when using S-scan.
Complexity
PAUT equipment is more advanced than conventional ultrasonic testing equipment, with multiple data optimisation features, the equipment should be used by a trained professional to remove the risk of inaccurate testing and gain the full benefits of PAUT.
Cost
PAUT equipment also tends to cost more than conventional ultrasonic testing systems. This is due to the advanced features offered by PAUT systems, although these can result in faster, more accurate and more efficient inspections, which can ultimately lead to a lower total cost of ownership.
Applications
Phased arrays can perform any job done by conventional ultrasonics and are used for a wide range of inspection and measurement applications, including those for medical imaging and industrial non-destructive testing (NDT).
Ideal for non-invasive material examinations, for finding flaws in welds and assessing the quality of rivets, PAUT can also detect cracks, voids and pits caused by corrosion. The technology can measure material and coating thickness, detect changes in material properties and inspect joints and interfaces, including adhesive mapping.
As an advanced NDT method, it is used to detect discontinuities to determine component quality, making it ideal for:
- Weld Inspections
- Thickness Measurements
- Corrosion Inspection
- PAUT Validation/Demonstration Blocks
- Inspection of Rolling Stock Wheels and Axles
- PAUT and TOFD Standard Calibration Blocks
- Pressure Vessels
This range of applications means that phased array is widely used in several industrial sectors, such as construction, pipelines and power generation.
What is a Phased Array Ultrasound Transducer?
A transducer is a device that converts one form of energy into another. In the case of phased array ultrasound testing, a piezoelectric crystal converts electric energy into ultrasound energy.
Phased arrays combine several ultrasound transducers that fire individual elements in a specific sequence to direct the soundwave in the desired direction.
Conclusion
Phased array ultrasonic testing provides a number of advantages and can be used in a range of applications and industries. As a non-destructive testing method, it is more reliable, effective and faster than many other methods, such as radiographic inspection.
While there are some drawbacks, with the correct training and when used on suitable applications, users can perform inspections of material thickness, welds, corrosion, adhesives and more.